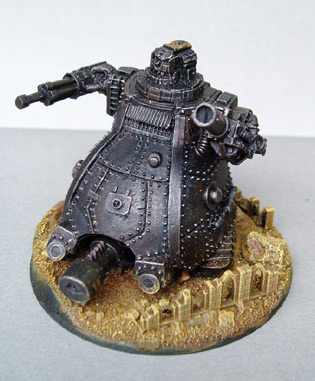
| My second Gargant arrived from Ebay assembled, but otherwise clean. There was quite a lot of glue residue on the surface of the model and the joints weren't very good between parts so I stripped him right down and started again. On re-assembly I tried to give him a more dynamic pose. as well as filling any gaps between parts with a touch of green-stuff.
When it came to modelling the base I decided to go for a more detailed approach than had been used on the Great Gargant and added some sectiones of ruined wall as well as building the surface up with milliput to give it a more uneven look.
|